Friday, February 27, 2015

Gluten-Free Food Allergy Fest in Austin

http://www.glutenfreefoodallergyfest.com/
 
I'll be attending Living Without's Gluten Free Food Allergy Fest this weekend in Austin. I am thrilled to be able to attend this! Be sure you are following me on my social media sites:


Twitter or @BrandyWendler
 
 
Instagram @BrandyWendler

so you don't miss a moment of all the excitement that the weekend will hold. If you are able to attend, please come and say hi to me!

Tuesday, February 3, 2015

A Gluten-free Present to Warm Your Heart (and Giveaway!)

Lets face it - I am horrible with my blog right now. I used to post really diligently but life kind of got in the way. I'm working on getting better but I'm not perfect. I used to post different stuff every month - fun, gluten-free info, recipes and products but lately, I haven't posted much and I'm sorry. However, I have a suggestion for new products you should look into until I get back in the habit - Love with Food. Have you heard of my awesome friend, KC, of G-Free Foodie. She has partnered with this company to bring you a fabulous, gluten-free product. Check out her facebook page here. You should defineitely be following her because she posts ALL the time and has FANTASTIC info and recipes for all your gluten-free needs. Anyway . . .

Love with Food is a company that I've really fallen in love with. (Perfect for a month that is known for love, right? - February.) They send you a box of junk-free and gluten-free goodies to your house (shiping is FREE - my favorite price!) for $24.50/month. In return, they donate TWO meals to the hungry in the USA. So not only do you get a gift for yourself, a box of 8-12 wholesome, gluten-free new treats for you to sample, but you give a gift as well. A gift to someone at home in America who is in need too not somewhere in another country. Who knows? You could be helping out someone who lives in the next city or just down the street. How amazing is that? I received my first box last month and was completely delighted!

Check out the picture:


There were several different types of chips and crackers, a yummy chocolate bar (that disappeared quickly), cake mix, a cookie sample, seasoning mix and more. Everything was non-GMO and dairy-free too (or vegan) which I really appreciate. Most of the items were full size as well which was awesome! Sometimes, the gluten-free world can be hard to maneuver and I appreciate a box of the month to help me find new flavors and wholesome products. Did I mention there were coupons in there too?! Some were for the products but one was a $25 gift card for Le Tote which is like Netflix but for women's fashion! Love with Food totally gets me! 

Here's the best part of this post though - since Love with Food is so awesome they are working with me to do a giveaway! Just write a comment at the bottom of this post. Any comment - maybe tell me your favorite valentine candy, why you enjoy being gluten-free, or maybe why you eat non-gmo. You choose, just talk to me. I'll announce two winners on Monday. Pay attention to this blog and my facebook to see if you're a winner. Even if you don't win, do yourself a favor and check this company out. You can sign up for your very own box at https://lovewithfood.com/subscriptions. Let me know what you think. 
 
Check them out on social media too!
 
Love with Food - Facebook
Love with Food - Twitter (@lovewithfood)

Until the next post -

xoxo

Brandy

Sunday, February 1, 2015

Go Red! February is American Heart Month

We like to distance ourselves from things that make us uncomfortable. Perhaps that's why we still have a huge misunderstanding in our society that heart disease just affects older males like they show in the movies or on television. I'm here to tell you that heart disease affects everyone - yes, even you! We are way past the point where heart disease occurs in isolated age groups of our society. Cholesterol and clogged arteries begins in childhood now. Research shows us that even toddlers may be developing clogged arteries due to inactivity and poor diet. So listen up!

 1 in 3 men and women will die of heart disease and stroke - 80% of this is preventable.

So this month, take time to make a promise to yourself. Find out your risks for heart disease and what you can do to prevent yourself from becoming a statistic.
Ask yourself these question to assess your risks:
  1.  How active/inactive am I?
  2.  What's my blood pressure? Cholesterol?
  3.  What is my risk for diabetes?
  4.  How healthy do I really eat?
    • How many servings of fruit do I eat in a day?
    • How many servings of vegetables?
  5.  What's my family history of heart disease?
  6.  How does smoking effect my risk for heart disease? How does my drinking effect my heart?
  7.  Am I overweight or is my waist circumference excessive?
 Listen, I care about you. So that's why this post may sounds straightforward or even harsh. I want you to live a long, happy life. So, these are questions you need to know the answers to so that you don't become the next victim of heart disease. Over 715, 000 heart attacks occur in the nation each year and 15% of people that have a heart attack will die from it. I want to make that number drop as much as possible. I don't want YOU to be included in that number - ever!

Need more info? The American Heart Association website is a good source to evaluate your risks and find out prevention tips. Go Red for Women is a great website geared toward ladies (and the red dress you may see out in store windows this month is associated with them.) Or keep tuned to me here or on Facebook for heart healthy lifestyle tips!

Stay healthy my friends!

Monday, December 29, 2014

Heart Disease and You

The holidays are typically a merry season where we spend lots of time with family and friends exchanging gifts and tasting delightful treats and just enjoying each other's company in general. It is this time of year that reminds us of how much we are loved and how full and blessed our lives are. Part of what I love so much about the holidays is that it brings family and friends together. The days are easy-going and full of laughter and yearly traditions and games. The nights are spent in front of the fire and lights of the Christmas tree with a warm drink remembering past holidays and adventures from other times in the year and viewing seasonal movies or home videos. Part of being able to enjoy this season year after year with one another is taking care of ourselves and staying healthy. So, while you are together with those you love, take the time to talk to one another about something that affects us all - Heart Disease. Heart Disease kills over 30% of our population every year. 


It is the #1 killer of men and women in the United States. 

All of us know someone affected by heart disease whether it is something as simple as high blood pressure, elevated cholesterol, or diabetes or something more complicated like a stroke or heart attack. Did you know that 80% of strokes and heart attacks are preventable? Learn statistics to find out if you’re at risk and what you can do to protect your heart and live a longer, healthier life and enjoy more holidays with friends and loved one!


If this image is hard to see click here

Sunday, November 16, 2014

Foster Farms Giveaway winners!


Thank you to all the people who participated in the Foster Farms #gluten-free corn dog giveaway on my Facebook page! I am happy to announce the winners of a coupon for a free box of their very own!

1) Rick N Kimberly A.
2) Meaghan H.
3) Kim F.
4) Susan N.
5) Karen C.

I posted on my Facebook page for the winners to please send me their e-mails so I can have the company contact them for their address for the voucher. I hope you all enjoy them as much as I do and they bring back wonderful memories! If you didn't win, please know that the product can be found in multiple different stores nationwide! Here is a list of places to find them:

1) Safeway (Von's, Randalls, Tom Thumb)
2) Kroger (Fry's and Smith's)
3) Raley's
4) Lucky
5) Albertsons
6) Giant Eagle
7) Woodman's
8) Copps/Roundy's
9) Schnucks
10) Food Lion
11) HyVee
12) Marsh

If I didn't name a place in your area, feel free to contact the company at 1-800-255-7227 for help finding a retailer in your area. 

Friday, November 14, 2014

Foster Farms Gluten-Free Giveaway!!


Recently, I was contacted by the fabulous people over at Foster Farms to trial their new gluten-free corn dogs. I have made corn dogs myself in the past (see recipe here) but it usually take a lot of time and effort. My husband and I used to have Fair food Fridays during the fall where we would make different types of our favorite fair foods that were gluten-free but when I started doing pageants that tradition stopped for awhile. Also, since moving to South Carolina my kitchen isn't as big as my old one, so I have had to downsize some of my cooking utensils and my big fryer went with it.

That being said, when I found out that a well-known company was putting out their own version of a gluten-free and dairy-free corn dog and they wanted to send me samples, I got really excited. Corn dogs are one of those things that reminds me of being a kid when everything was easier. My mother used to treat my sister and I to corn dogs (or cheese dogs, remember those?) at the mall if we behaved. Not the best food for a balanced diet as an adult, I will admit, however, there is just something about the taste of a corn dog that makes me feel like everything will be ok. Occasionally, as a celiac, I need that, don't you?

As part of my excitement and the generosity of the company, they sent me a sample to taste (Check out the picture below) as well as five coupons for a free box of corn dogs if you enter my giveaway! These corn dogs are certified gluten-free by GIG, contain less than 10ppm of gluten per serving, and feature a 100% chicken frank dipped twice in a honey crunchy batter. What's not to love?!

Check my Facebook page to enter. Simply tell me your favorite memory associated with corn dogs or your favorite way to eat them in a comment under the post. You must also like the Foster Farms Facebook page but as soon as you do both things, you're entered!


Winners will be announced Sunday evening!! Good luck!

Monday, January 6, 2014

January Product of the Month

After cooking for what feels like two months straight, I've been looking for some easy yet healthier meals for me and my hubby. On nights when we have both had busy days, I am grateful for Perdue's new gluten-free chicken tenders. They are easy to make, taste great, and don't have any ingredients I have allergies too!

The directions call for cooking them for 10 min but my husband likes them crispier so I flip them after ten minutes in the oven and put them on for ten minutes more. I guess it just depends on your preference. I get them at our local Harris Teeter in Charleston but have also found them at Publix in the Atlanta area.

Alternatively, Tyson has a gluten-free chicken tender as well. However, the Tyson version has soy oil in them so I am unable to eat them. I have also heard through people on my Facebook page that the Tyson ones don't taste as good either so that makes me feel like I'm not missing out. :)

I add a side of two vegetables and/or brown rice for a quick dinner that my husband and I both love. I have also paired these with my Vegan Mac & Cheese which I know can helps appease a picky crowd!

Friday, January 3, 2014

January Recipe of the Month


I promise I didn't intentionally pick a recipe that appears complicated to start of the year. However, this Vegan mac n' cheese, made with a cashew cream sauce, is worth any trouble you may think it may cause. I promise, as long as you have the ingredients and a good food processor, its actually pretty easy! Since I am dairy-free along with being gluten-free, vegan recipes are something I have enjoyed learning how to work with. My older sister [who eats only 5 different foods (actually foods not food groups) like chips, hot dogs, ketchup, bread and ham] loved this recipe so much she requested it for her birthday. My younger sister had no idea there was no actually cheese in it until I told her it was vegan. Then she was really confused that didn't stop her from eating a second helping.

The original recipe that inspired me from Vegangela.com called for miso paste (which is a soy derivative) but I am allergic to soy so I omitted it and I don't think it really affected the recipe at all. It also called for truffle oil but since I forgot to buy it (and my sisters would probably hate the flavor anyway) I omitted it as well. So here is my humble version:

Vegan Mac & Cheese

Ingredients:


  • package gluten-free macaroni noodles, cooked (I use Tinkyada)
  • ¾ cup raw cashews
  • 1 + ¾ cups almond milk
  • ¼ cup canola oil
  • 1.5 tbsp cornstarch
  • ¼ cup nutritional yeast
  • 1 tbsp lemon juice
  • 1 tsp onion powder
  • ½ tsp garlic powder
  • ½ tsp salt

Directions:

1) Place cashews in the food processor and finely grind (just don’t let the cashews turn to a paste). Set aside. **I recommend raw chases because the will grind better. If they are roasted already with an oil the sauce may turn out to be a bit grittier**
I then add the nutritional yeast, onion powder, garlic powder and salt in the processor and pulse another time or two until well combined.

2) In a heavy saucepan, combine milk and oil. Bring to a simmer over high heat and then add the cornstarch slowly while stirring. (The original recipe added the cornstarch before heating and it clumped on me the first time so I added it after heating the second time and it thickened perfectly.) After the mix simmers, decrease heat to low heat, cover and let simmer, stirring occasionally for 10 minutes, or until cornstarch dissolves.

3) Once the cornstarch and milk/oil mixture is heated, add to the food processor (the Ninja has a little opening so you can blend and add at the same time) and pulse or blend to combine well. This is when I add the lemon juice.
Alternately, you can add the dry cashew mix to the saucepan with the wet mix and whisk well. Just don"t forger to add the lemon juice.

4) Once the sauce is combined and smooth add the cashew cheese to the macaroni noodles, and serve.

I added the Perdue gluten-free chicken tenders (which are my product of the month for January) for my sister's birthday meal (because she loves childhood meals like this). I also added a side of steamed broccoli so I could feel a little healthy about it. Neither of my sisters ate any broccoli but my mom and husband appreciated it. Hope you enjoy yours!

Monday, December 30, 2013

Save the dates for more Gluten and Allergen Free Wellness Events in 2014!

Its never to early to start planning on attending these fun and education events for next year. There is guaranteed to be one near you!

**For updates, follow them on twitter @GFAFWellness


Admission to the events includes:
  • Product sampling and sales from more than 50 companies
  • Free lectures from well known members of the gluten-free community about gluten and allergy free living 
  • Free cooking demonstrations that invite you to explore the world of gluten-free cooking one delicious bite at a time
  • A free gift bag to tote around samples and purchases


SAVE THE DATE 2014

Austin, TX - February 2

Charlotte NC - March 29

Nashville TN - April 26


Little Rock, AR - June 21

Raleigh/Durham NC - August 9 

Virginia Beach, VA - September 13

Hartford CT - October 4

Jacksonville, FL - November 1


Monday, December 9, 2013

A healthier brown sugar - it is possible!

Life without gluten is hard enough but so many times we add a lot of sugar to our gluten-free foods to make up for the taste. However, having too much sugar in your diet can cause a lot of inflammation in your body. Refined sugar is a highly inflammatory food and can really upset the balance your system tries to maintain. Inflammation in your food does not just affect your gut. If you've read some of my other posts - it affects other organs like your heart.
However, I have a sweet tooth and its demands must be met. So here is a little trick I want to share with you if you have a recipe that calls for brown sugar and you want to cut the calories and inflammatory factor WAY back.

Molasses + powdered Stevia + a little mixing = brown sugar!!

It's about a 1 tablespoon to 1 cup addition. If you have 1 cup of stevia then add 1 tablespoon of molasses. A little more than a tablespoon won't hurt but I started with a tablespoon and kept mixing until I got the brown sugar consistency that I liked. Sometimes powdered stevia can be very dry depending on the brand you are using. So, half a cup of stevia + 1/2 tablespoon of molasses will give you a half a cup of brown sugar and so on. 

I've used it in my sweet potato casserole, pecan pie and my berry crisp and not even my picky little sister could detect it! Try it and let me know what you think!

**Side note: This must be used fairly quickly. It doesn't do well if left out or made ahead of time. I always use it in the recipe I am making right away.  

Saturday, November 2, 2013

November Product of the Month

When I found out that Pillsbury was coming out with their own #glutenfree line I was a little skeptical yet, I was also secretly really excited at the same time. It could mean some excellent new products for those of use with Celiac Disease or gluten intolerances. Pillsbury products were a favorite of mine when i ate gluten and even though I don't usually like to use too many processed products in my diet, its that time of year when pies, pastries, and all sorts of yummy warm food reigns. So, I felt it was my duty to at least buy and try the products once and let the community know what I thought.
I was excited to find their dough at the small Publix near my mom's house. If they were there, it means they are getting around. That store doesn't normally have the largest selection and before I post about something in the store I like to make sure others can find it. They had the cookie dough as well but that is for another post. At the Publix, these were nearly $5 but I did manage to find them at the Commissary on base in Charleston for less than $3. Also, a lot of people on my Facebook page told me that you could find them at some dollar stores on the eat coast (which is AWESOME!).

I used the pastry dough for my pecan pie and it turned out fabulous. My husband and father could barely tell the difference between a store bought Pillsbury pie pastry and this one. I will have to tell you though that the pastry dough is not soy-free. The first ingredient is Soybean oil and soy is one of the foods I react the quickest too. It gives me really bad stomach cramps (and other issues I won't detail) so I only worked with it with my hands and trusted my fussy (non-gluten free) dad and supportive husband to let me know their thoughts. They approved. So, for a quick gluten-free pastry dough during this busy season, try picking some up and feel free to let me know what your thoughts and experiences are! Happy Baking!

Friday, November 1, 2013

November Recipe of the Month

During the fall season, my husband loves pecan pie and sweet potato pie. While I have managed to conquer sweet potato pie, Pecan pie has always been a struggle for me. I have never been able to perfect the recipe. It usually burns on the top or ends up runny in the middle. Or I burn the crust or it tastes bad. I've made half a dozen and still never made the ideal pecan pie. Even when I started using the pre-made pillsbury pie dough that just rolls out I still had the first two issues I mentioned. My neighbor Margot always seems to have the best baked goods and I usually end up inviting her over to our parties and requesting her pecan pie because my husband loves it so much. She knows it too so don't think you can blackmail me with telling her!
However, since we moved recently, I was determined to not fail at this domestic challenge anymore. When I bought the new gluten-free Pillsbury pastry dough and looked at their website for a recipe to play with the new product, I stumbled across their pecan pie recipe. I decided to take a deep breath and accept the challenge. So while this recipe isn't my own and doesn't have any of my typical flair, it does work like a charm. Every. single. time!

Pillsbury Gluten-free Pecan Pie

Ingredients:

Crust
  • 1/2 container Pillsbury® Gluten Free refrigerated pie and pastry dough

Filling
  • 2/3 cup sugar (I have used Stevia successfully)
  • 1/3 cup butter, melted (I use Earth Balance Soy-free)
  • cup corn syrup (I used light Karo)
  • eggs
  • cup pecan halves or broken pecans (sometimes I add an extra 1/3 of a cup because I like pecans)

Directions:

1) Heat oven to 375°F. Knead dough until softened and no longer crumbly. Flatten into a round; place between 2 sheets of cooking parchment or waxed paper. Roll into a round 1 1/2 inches larger than top of 9-inch pie plate.

2) Carefully peel off top sheet of paper. Replace paper to cover loosely; carefully turn dough over, and remove second sheet of paper. Use paper to carefully turn dough over into ungreased pie plate; remove paper. Press dough firmly against bottom and up side of plate. Flatten edge with fork or crimp for decorative edge.

3) In medium bowl, beat sugar, melted butter, corn syrup and eggs with whisk or hand beater until well blended. Stir in pecans. Pour into crust-lined pie plate. **Their recipe says to cover the edges of the crust with strips of foil but I cover the entire top with foil.

4) Bake 40 to 50 minutes or until center is set, removing foil for last 15 minutes of bake time (I use a pie shell edge cover for this part as well because I fear burnt edges). 

5) Cool 30 minutes. Refrigerate at least 2 hours or until chilled. (Do NOT skip the refrigeration step!)

Serve with whipped cream. Cover and refrigerate any remaining pie.

Monday, October 7, 2013

October Recipe of the Month

October ushers in my husband's favorite time of year. He loves loves autumn and all that comes along with it. He likes the colors of the leaves changing, he likes the temperature trending lower, and one of his two favorite holidays happens this month. Since we have been married, I think his next favorite part of fall is the food that accompanies it. As soon as the pumpkins and other gourds start appearing at the grocery store, he starts bringing them home and asking me to make certain foods.

One that he never seems to be able to get enough is Sweet Potato Casserole. My mom makes it every year for our Thanksgiving feast but once my husband got a taste of it, it became a regular dish in the fall. (The way she makes it is actually more like a pie but since we don't use a crust we call it a casserole.)

I've managed to clean it up a bit and make it a little healthier but for those of you who are purists (like my husband), I'll give you both options for it.

MOM'S SWEET POTATO CASSEROLE


Ingredients:
  •   2 eggs
  •   1 cup granulated sugar (can substitute with Stevia)
  •   1/4 cup butter, softened (I use Earth Balance)
  •   1 teaspoon vanilla
  •   1 teaspoon cinnamon
  •   ½ teaspoon nutmeg
  •   3 cups cooked mashed 
  • sweet potatoes
    Topping:
  •   1/2 cup brown sugar (brown sugar from stevia recipe here)
  •   1/3 cup gluten-free flour of choice (for a healthier kick, I use a 50/50 mix of blanched almond flour and ground flax)
  •   2 tablespoons butter, at room temp (Earth Balance again)
  •   3/4 cup chopped pecans (sometimes I add more)


  Topping:
1) Bake sweet potatoes in oven at 400 degrees F for about an hour (depending on the thickness). I usually line a pan with foil, poke holes in the sweet potatoes with a fork and then set them for an hour. When the sweet potatoes start to ooze from the holes then I know they are done. 
2) Allow sweet potatoes to cool to touch before peeling. You can turn the oven off during this time. 
**This step can be done ahead and the sweet potatoes can be refrigerated for later use. 

3) Preheat oven to 350 degrees F and grease a 2 quart casserole dish or two 8x8 square pans. 
4) In a large bowl, beat eggs, granulated sugar, 3/4 cup butter, vanilla, cinnamon, nutmeg and the mashed sweet potatoes with an electric mixer 
5) Spoon mix into dish(es) for baking and spread out evenly 
6) Combine brown sugar, flour, 2 tablespoons softened butter, and pecans, mixing until crumbly 
7) Sprinkle topping ovesweet potatoes
8) Bake at 350° for 45 minutes

Tuesday, October 1, 2013

Another Gluten and Allergen Free Wellness Event Coming Soon!

I am honored to have the opportunity to attend this conference and speak with some other amazing gluten-free community members. You won't want to miss it! Click here for full details!


November 2, 2013 
10 am - 3 pm 
3848 West Lakeshore Drive 
Baton Rouge, LA 70808 

REGISTRATION AVAILABLE ONLINE 

$10 per adult
Children under 13 are FREE to enter
Students of LSU may show student ID for 50% off admission

FREE PARKING

Monday, September 2, 2013

September Recipe of the Month

What's a berry crisp?

I first came upon the concept of a berry crisp while eating dinner in Atlanta with some pretty notable gluten-free chicks. Andrea, of Rocking Gluten-free, was in town visiting and decided to get a group together. Jennifer Harris, our local Atlantan gluten-free food blogger, was there as well as another familiar face in the Atlanta gfree community, Andrea Harrison (@arbharrisonjr). It's always a good time when a bunch of us get together and I was honored to be invited to the table.
Atlanta has a plethora of gluten-free friendly places and since I lived there for over a decade I thought I knew most of the places around me. However, I had never been to Double Zero Napoletana. It would not have been the first place I picked to eat because I tend to be a picky eater (I'm working on it) and usually stick to what I know. However, I am glad that I have some friends who are so much cooler than I am and have more refined tastes because I would've missed out on my greatest dessert recreation so far! So here it is -

The Sensational Berry Crisp!

Ingredients:


  • 2 12 oz packages of frozen mixed berries (I like blackberries and strawberries but will occasionally throw in raspberries and blueberries. If you get strawberries, sliced works better than whole). Do not thaw berries - keep frozen.
  • 1/4 cup sugar (I use stevia but organic or regular sugar works well too)
  • 1/4 cup gluten-free flour (I have used Gluten Free Pantry or King Arthur All Purpose with equal success)
  • 1 tablespoon of lemon juice (I prefer fresh but it won't hurt if you use bottled)

Topping:


  • 3/4 cup Old Fashioned Rolled Oats (I used Bob's Red Mill gluten-free and they work perfectly)
  • 2/3 cup packed brown sugar (if you want to use a stevia version for lower sugar content check out my brown sugar stevia recipe here)
  • 1 tsp cinnamon
  • 1/2 tsp ginger
  • 1/4 tsp nutmeg
  • 1/4 tsp salt 
  • 3/4 cup gluten-free flour (I have used Gluten Free Pantry or King Arthur All Purpose with equal success)
  • 7 tablespoons of chilled butter ( I use Earth Balance Soy-free version)

Directions:


1) Preheat the oven to 375 degrees F. Combine berries, 1/4 cup sugar, 1/4 cup flour and lemon juice in a large bowl - toss well to blend.
2) Transfer the berry mixture to a 9-inch glass dish (can be a pie dish or a square Pyrex)
3) Combine the topping ingredients - 3/4 cup flour, oats, brown sugar, spices, and salt in a medium bowl. Toss to blend evenly
4) Add the butter and dice into small pieces as you add it (make sure it is still chilled) because you are going to rub it into the topping with your fingertips or you can use a fork to mash it together into small clumps. Trust me, it works a lot better with chilled butter than room temp.
5) Once the topping is well-combined, sprinkle/spread over the berry mixture. Don't worry if it isn't coated entirely even because it will spread when baking.
6) Bake the crisp until the berries bubble on the sides of the glass and the topping is golden brown. This will take about one hour. Let it stand about 15-20 minutes at room temp before serving.

If you have any left, it refrigerates well for a few days (it never lasted longer than that in my house) and then you can heat it up later. Just place in a bowl - It will be slightly runny if warmed up in the microwave. but still tasty!

**Side note: I have tried this recipe in 5-6 individual rectangular ramekins (3" long) and it works better if you have 2- 16 oz bags of frozen berries and you make a little extra topping (about 1 1/2 the amount.) Baking time is about 30 minutes or until you see bubbling on the side of the ramekin.

Sunday, August 4, 2013

August Recipe of the Month

Every now and then, you have a craving for something different. I had been craving Thai food lately and since my husband refuses to let me order from my local Thai place every night (something about costing too much money), I decided that maybe I should branch out and create a interesting cultural Thai dish in my own home. Except, I am a bit of a wuss, so I went to my favorite recipe website, Simply Recipes, and looked up some of their recipes for inspiration (particularly this one). I figured if it turned out that I didn't like the taste than at least it was someone else's fault and not my own, right? Well, I ended up with a dish that packs a lot of flavor and fed my hubby and I for several nights. It fulfilled my cravings and I felt a little more accomplished in the cooking department. (mental pat on the back for sure)
A great little bonus with this dish is that it is packed with antioxidants from all the seasonings and spices. So eat up and enjoy!

Basil Chicken in a Coconut Curry Sauce


INGREDIENTS

  • 1/2 teaspoon ground coriander
  • 1/2 teaspoon cumin
  • 1/2 teaspoon ground cloves
  • 1/2 teaspoon cinnamon
  • 1/2 teaspoon ground cardamom
  • 1/2 teaspoon freshly ground black pepper
  • 1/4 teaspoon chili powder
  • 1/4 teaspoon turmeric
  • 1 lb skinless, boneless chicken breasts
  • 1 large red onion, chopped 
  • 5 cloves garlic, minced
  • 2 jalapeño peppers, seeded and minced
  • 2 Tbsp olive oil or grapeseed oil (I used olive)
  • 1 14-oz can coconut milk (canned is better than carton)
  • 2 teaspoons cornstarch
  • 1 teaspoon Worcestershire sauce
  • 3 Tbsp fresh basil leaves, chopped (I used about 1 tablespoon of dried basil and it tasted fine to me)
  • 1 Tbsp finely chopped fresh ginger (can be omitted - I have a love/hate relationship with ginger)
  • Cooked brown rice (I'm really lazy and used the instant bags)

METHOD

1 In a small bowl, mix together the salt, ground coriander, cumin, ground cloves, cinnamon, ground cardamom, black pepper, chili powder, and turmeric. Set aside.
2 Cut chicken into small (about 1-inch) pieces. Put into a bowl and sprinkle the spice mix over all the pieces. Coat well and let sit for 30 minutes at room temperature or in the refrigerator for 1 to 2 hours.
I placed the spices on the whole piece of chicken and cut it after because it was easier for me but you can do it either way
3 In a large skillet heat 1 Tbsp oil on medium high heat. Add the onions and jalapeños and cook for 3 minutes. Add the garlic and cook for 1 minute more. Remove the onions, peppers and garlic from the pan and put into a medium sized bowl. Set aside. Use the same pan for the next step.
4 Add 1 Tbsp oil to the skillet and heat on medium high heat. Add one half of the chicken pieces, spreading them out on the pan so they are not crowded. Brown for a few minutes on each side. When the chicken pieces are cooked through, and no pink remains, remove from pan, add to the bowl with the onions. Cook the second batch of chicken pieces the same way. Remove from pan, add to bowl with onions.
5 Add the coconut milk, minus a couple tablespoons, to the skillet. In a small bowl, mix the remaining coconut with the corn starch to dissolve the corn starch. Add the corn starch mixture back to the skillet with the coconut milk. Cook on medium heat and stir till thick and bubbly. Mix in the Worcestershire sauce. 

6 Add chicken mixture, basil, and ginger. Cook 2 minutes more to cook through.

Serve over rice.

ENJOY!

Yield: Serves 4

Thursday, July 11, 2013

Raleigh Gluten and Allergen Free Wellness Expo

I'll be attending and speaking here and I am so excited! Click here for more details. 

Mark your calendars!


August 17, 2013

10 AM - 4 PM

301 West Morgan Street 
Durham, NC 27701


ADMISSION
$10 per adult
Children under 13 are FREE to enter
College Students get $3 off admission at the door only w/ Student ID

Parking FREE on streets of Durham during weekends

REGISTRATION IS AVAILABLE 
AT THE DOOR

Admission includes FREE LIVE music by 
at 3 pm Presentation Stage 1
Kelly Bourgeois has a severe wheat allergy and is an inspiration to
Gluten free kids everywhere!

Sunday, July 7, 2013

July recipe of the month

Having been eating really clean and super healthy for over 4 months now, I needed a little splurge after my week at my national pageant. However, my stomach has been really sensitive to a lot of things lately and I recently went through an episode of Eosinophilic Esophagitis. I think it was triggered by eating refined sugar after weeks of not having any but that is still just speculation. So, I wanted a treat but I looked for a recipe that had the fewest ingredients possible and would still be tasty and sweet!
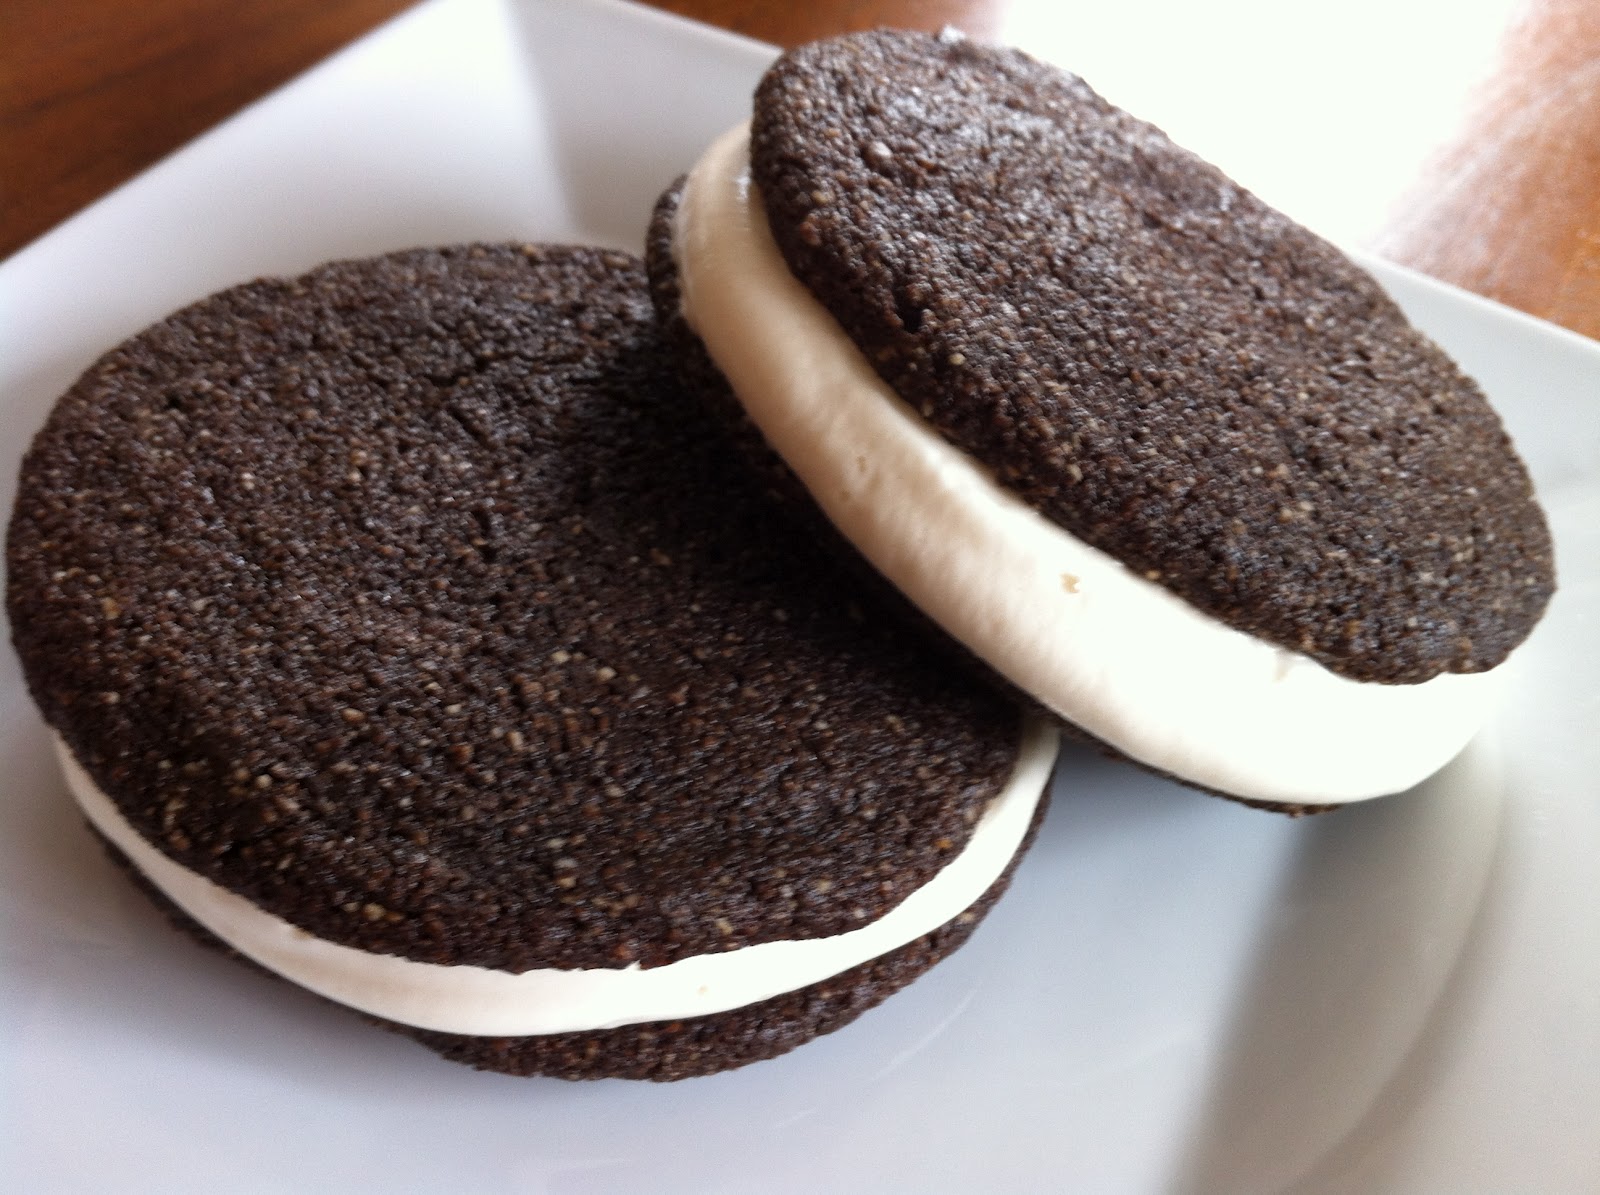
I have been a fan of Elana Amsterdam and her recipes since I was first diagnosed. Since I started following her, she has published two recipe books that are fantastic! She has always loved to cook but when she was diagnosed with Celiac Disease she wanted to find a way to make tasty meals for her family that they all could enjoy instead of having to cook two different meals. If you don't follow her blog, you really should consider it. She is an inspiration and while I have never met her in person, I am told she is just as beautiful on the inside as she is on the outside. I picked up her first book, The Gluten-Free Almond Flour cookbook, and flipped through the pages to find a simple recipe that I could enjoy and my tummy wouldn't reject. I stumbled upon a cookie recipe and was delighted with its simplicity! To my husband's delight - there was an icing recipe that was just a simple so I decided to make some cookies for myself and sweet southern whoopie pies for him!

CHEWY CHOCOLATE COOKIES

Ingredients:
  • 3 cups blanched almond flour
  • 1/2 tsp salt
  • 1 tsp baking soda
  • 1/2 cup arrowroot powder
  • 1/4 cup unsweetened cocoa powder
  • 1/2 cup grapeseed oil
  • 3/4 cup agave nectar
  • 1 tablespoon vanilla extract
Preheat the oven to 350 degrees. Line a large baking sheet with parchment paper. In a medium size bowl, combine the dry ingredients (almond flour, salt, baking soda, arrowroot powder, and cocoa powder. In a small bowl, whisk together the wet ingredients (grapeseed oil, agave nectar, and vanilla extract). Stir the wet ingredients into the almond flour mixture until thoroughly combined.
Now, the recipe calls for 1/4 cup scoops of dough onto the baking sheet. However, they come out way too big so I would recommend using a 1 tablespoon scoop instead and place them 2 inches apart from one another. Bake for 10 to 15 minutes until the tops of the cookies look dry and start to crack. Be very careful not to overcook them. Let the cookies cool on the baking sheet for 30 minutes and spread with frosting just before serving. If the frosting stays on too long it may make the cookies soggy.

MARSHMALLOW ICING
*Note: this icing recipe is not identical to Elana's but very similar

Ingredients:
  • 1/2 cup agave nectar
  • 2 egg whites
  • 1/4 tsp cream of tartar
  • pinch of salt
In a small saucepan over medium heat, bring the agave nectar to a boil, stirring frequently. Decrease the heat to low and simmer for 4-8 minutes, watching constantly and stirring occasionally, until the agave nectar darkens slightly from its original amber color.
In a medium bowl, add the two egg whites and the pinch of salt. Using a handheld mixer, whip the egg whites until they are no longer clear (about halfway through mixing) and add the cream of tartar. This helps to stabilize the mixture so it doesn't liquefy again. Beat the egg white into stiff peaks. This means, when you remove the beaters, peaks form and do not fall back over into the mixture. Be careful not to over beat the eggs or you could destabilize them. I had to make this recipe twice to get it right so, don't worry if it doesn't work out the first time. :)
Drizzle the agave nectar slowly into the egg whites, whisking continuously at a low speed until blended. Use to frost cookies. I put the bowl of icing in the fridge for about 30 minutes while the cookies were cooling to help it set and it spread a lot easier. The icing can be stored in a mason jar in the refrigerator for up to 24 hours.

Best part? My taste buds and tummy agreed on this recipe! ;)